Purchase Orders How-To Guide
Last updated October 23, 2025
A written article is in the works, in the meantime, please review the following video for a guide on how to create Purchase Orders in Drinks POS:
Using Purchase Orders in Drinks POS
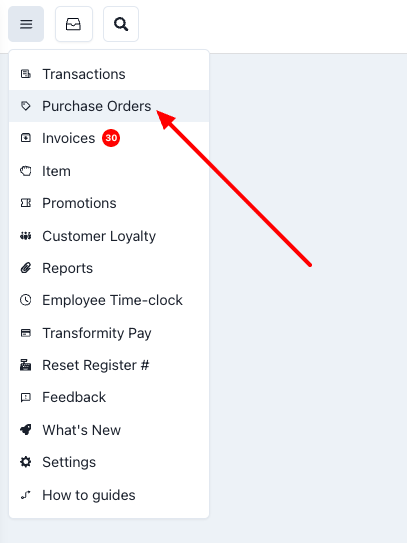
The first step to place an order using Drinks POS is to create a Purchase order. To do this, go to the main menu on the upper left corner of the screen and select "Purchase Orders" from the dropdown menu.
Once in the Purchase Orders module, click on "Create New" and the following popup window will appear.
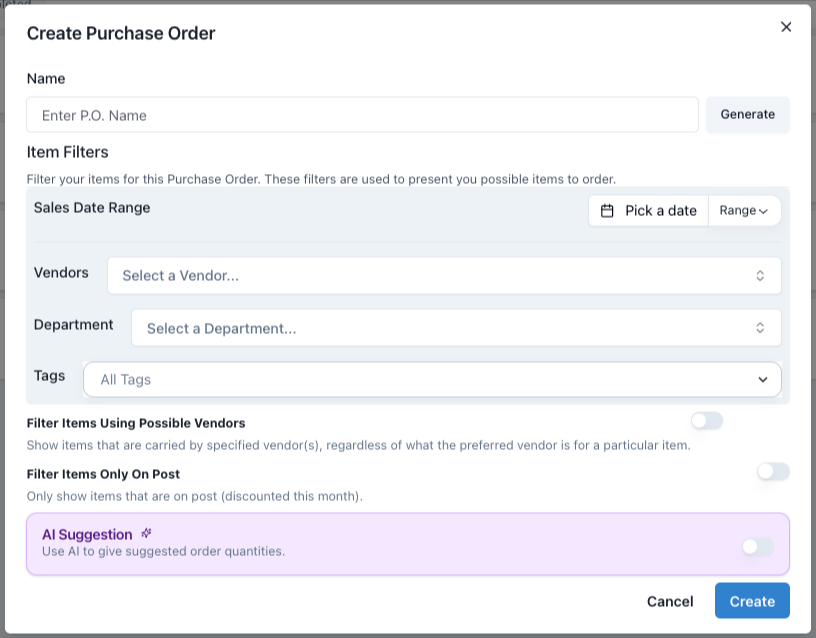
Selecting Your Purchase Order Settings
- Name: Select a name that will make sense to you. Some users use the vendor + date of order. You can also use the "Generate" button for our system to create a date and time based name.
- Item Filters: This filters will determine what items are presented to your for ordering.
- Sales Date Range: If a date range is selected, only items sold during that date range will be shown to you in the PO. You can still search for items outside that range, but they will not be displayed automatically.
- Vendors: This lets you select a vendor you would like to order from. The PO will then only show you items for which the vendor is a favorite.
- Department: This is optional, but you can select the department for which you are trying to order (for instance, if you only wanted to order wines)
- Tags: This is also optional, and it would allow you to narrow your search even further by only showing you items you have previously tagged with the tag selected.
- Special Toggles:
- Filter Items Using Possible Vendors: This would allow the PO to show items for which the vendor selected is not the favorite, but that are carried by it.
- Filter Items Only On Post: This would filter the PO to show only items that are discounted this month.
- AI Suggestion: Toggling this on allows our AI to give you suggestions on what to order based on your sales history (we will dive deeper later in the article)
Once you have decided your settings, you can click "Create."
Organizing Your Purchase Order
Once your PO has been created, you will see a table with a list of items based on your selections. You can, however, further customize this view by clicking on "Settings" which will open a pop up window.
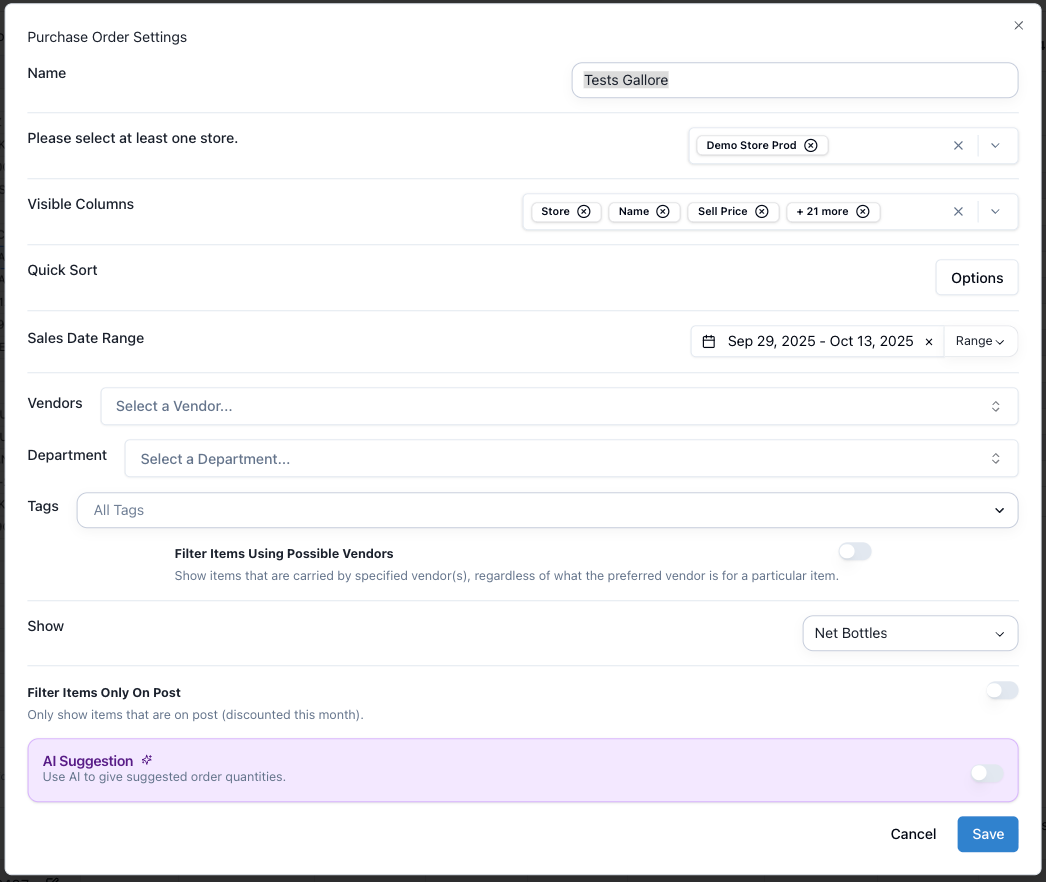
- Selecting Your Store(s): This is optional. If you have more than one store, you may want to look at them all at the same time when placing an order. You may use the dropdown menu to check the ones you want to include, and you may remove stores by unchecking them or simply x-ing them out.
- Visible Columns: You can add or remove columns as you prefer. Use the dropdown menu to check the ones you want to include, and remove columns by unchecking them or simply x-ing them out. *Pro Tip: You can change the columns configuration by dragging them to a different position on the table. Simply hover over the title until you see a pointy hand, then click and hold until the hand closes, then drag your column to the desired position.
- Quick Sort: This option allows you to quickly sort your rows by store, item, or weeks first.
- Review Range, Vendors, Department, Tags: These are some of the same options available when creating your PO. They appear here again in case you would like to modify them in any way.
- Show: This refers to whether you would like the PO to show the ordering options in net bottles or cases. Use the dropdown menu to choose.
- Filter Items Only On Post: You can toggle this on if you would like to only see items that are currently offered at a discount price.
- AI Suggestion: This option appears again so that you may use it whenever you are ready (more on it towards the end)
Understanding Your Purchase Order
For the sake of this example, we are choosing "Last 30 Days" as our range, this means we will see only items that were sold in the las month.
As mentioned above, you can add and remove as many columns as you need, as well as drag them to visually match what you have in mind. In this case, I have removed a lot of the columns and dragged them to different positions to end up with only Store, Name, Size, Last 30, On Hand, Bottles, Cases, Weeks, On Order, On Transfer, Pending Transfer, Last Purchased Date, and Vendor.
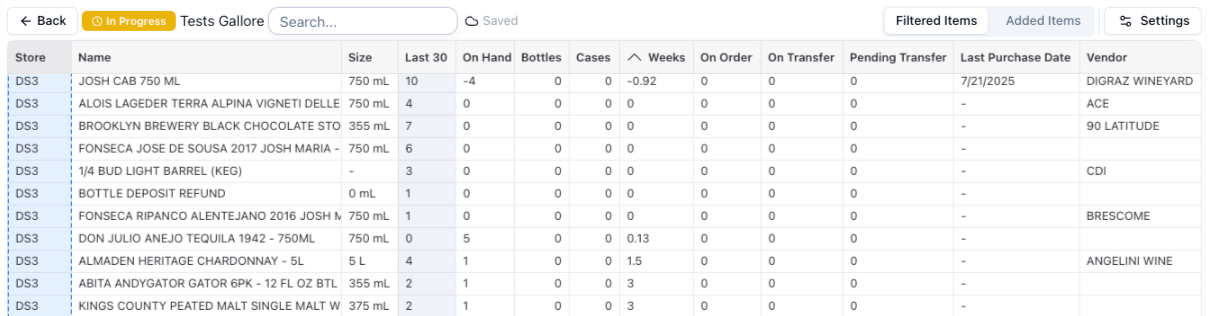
*Please note that your table may look very different from the one in this example, based on how you customize it using the settings popup menu.
- Store: This field shows the name of the store for which you are ordering. This is especially important if you are managing multiple stores.
- Name: This is the product you may be ordering for your store
- Size: This is the size of the product you are ordering
- Last 30: This indicates how many units of the product you sold in the last 30 days (this would change if you chose 14 days, 7 days, etc)
- On Hand: Indicates the number of units you currently have in stock
- Bottles: This column is where you will enter the number of bottles (units) you would like to order for this period
- Cases: This column is where you will enter the number of cases (if any) you would like to order for this period
- Weeks: This field tells you how many weeks you have stock for, based on your current selections. The field changes when you enter units under Bottles or cases.
- On Order: This is where you can see if you already have an order for this product on the way
- On Transfer: This indicates whether you have already started a transfer of this product (from another store you manage)
- Pending Transfer: This indicates if you have a transfer of this product pending
- Last Purchased Date: This column shows you the last time you bought this item
- Vendor: This indicates the preferred Vendor for the item selected
How to Complete your Purchase Order
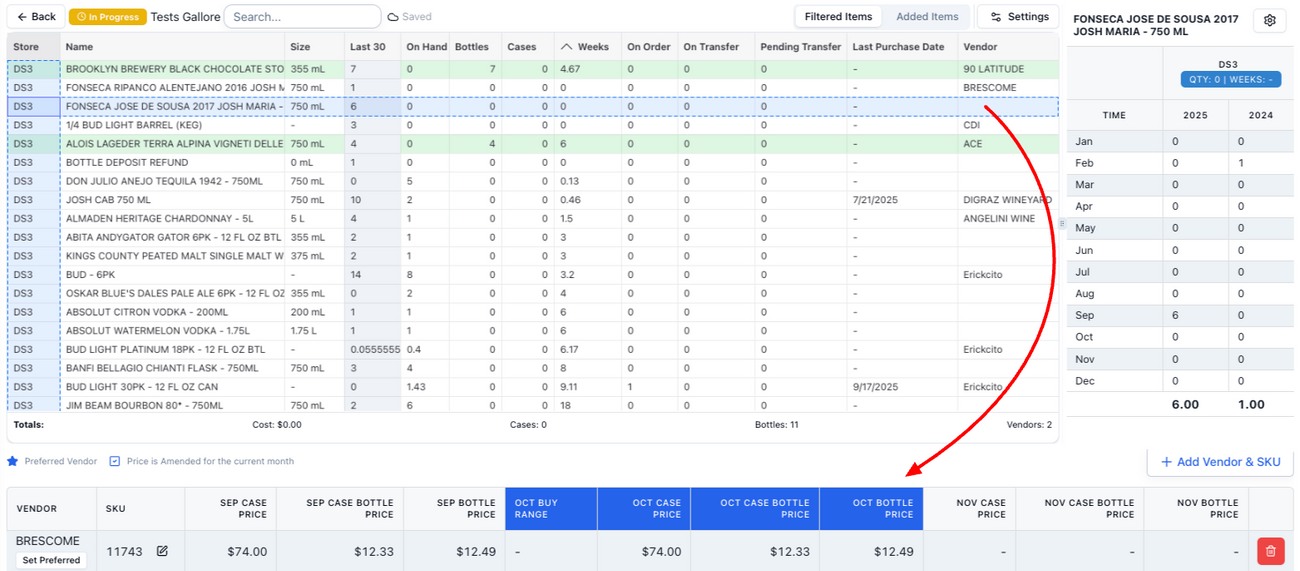
We recommend sorting the table by the "weeks" column. This will allow you to know exactly which products need the most ordering.
For instance, on the table below, you can see that "Brooklyn Brewery Black Chocolate Stout" sold 7 units in the past 30 days. You have "0" on hand, and this means you have stock for zero weeks:

Let's say you decide you would like to have enough for the next 30 days, then based on last month's sales, you would order 7 bottles:

As you can see, the row turned green, indicating you are ordering that product. also, the weeks column now shows that you have enough stock for 4.67 weeks (30 days).
As you go down the list, your table will look greener and greener.
Preferred Vendor
Not al items will have a preferred vendor. If this is the case, the "Vendor" column will be empty for that product. Because you need a vendor to be able to order, our system will give you one or more vendor suggestions at the bottom of the page.
For instance, Fonseca Jose De Sousa 2017 does not seem to have a preferred vendor, so a suggestion row appears:
You can click on the "Set Preferred" button on the suggestion row,
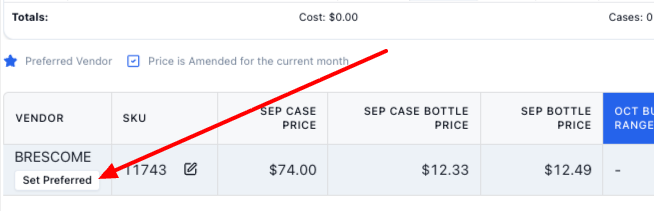
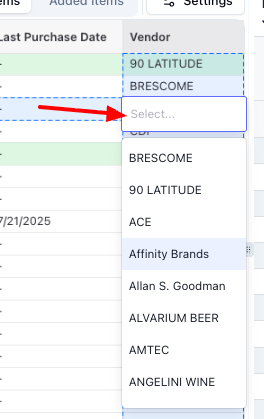
or simply choose a vendor from the dropdown menu on the vendor field of the product row.
Some items may not have vendors or suggestions. This may mean your vendors are not linked.
Linking Your Vendors to Managed Vendors
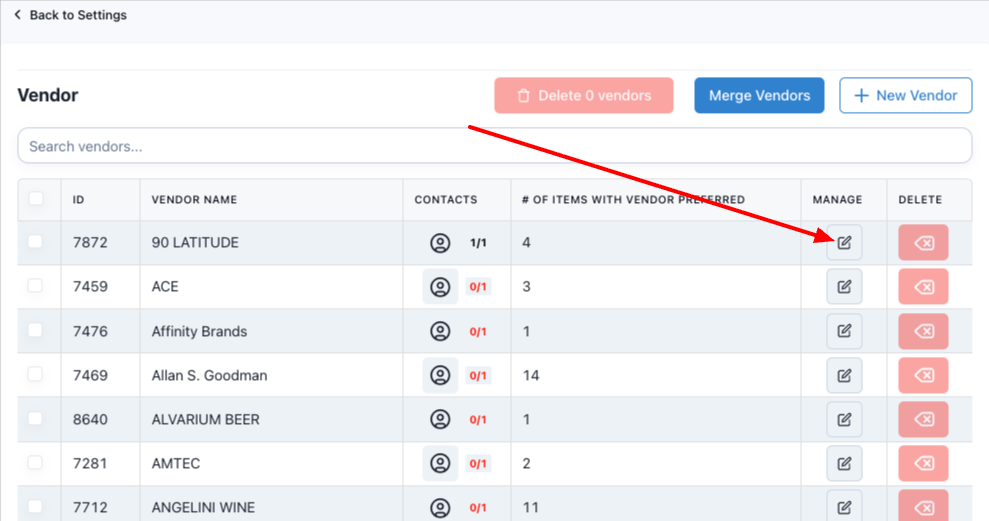
To have your vendors linked, you can navigate to Main Menu>> Settings>> Vendor Management>> Vendors and click on the edit icon next to each vendor:
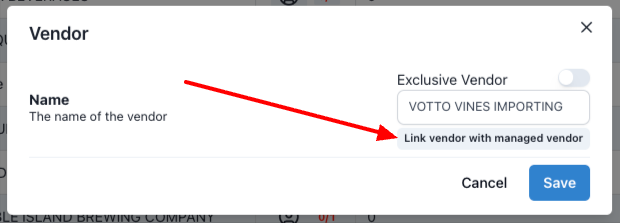
There you should click on "Link vendor with managed vendor":
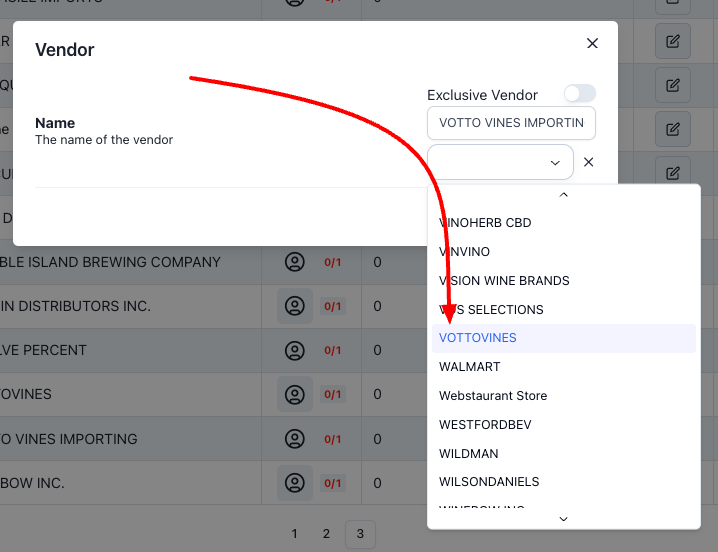
And select the managed vendor from the drop down menu:
You can verify that it is now linked by clicking on the vendor one more time and seeing a message highlighted in green that reads "Linked to Managed Vendor"
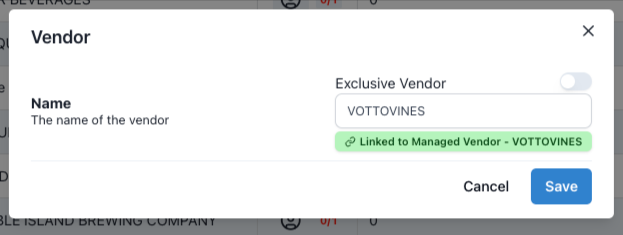
*Please note that names do not always match 100% percent. They may have extra words or different spelling
Finalizing Your PO
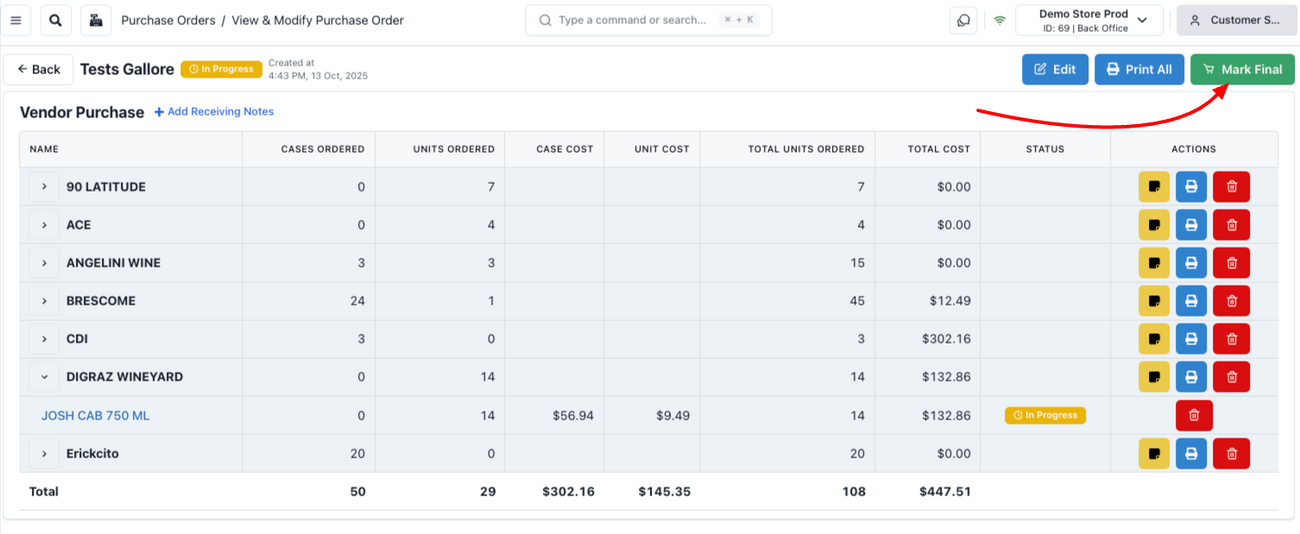
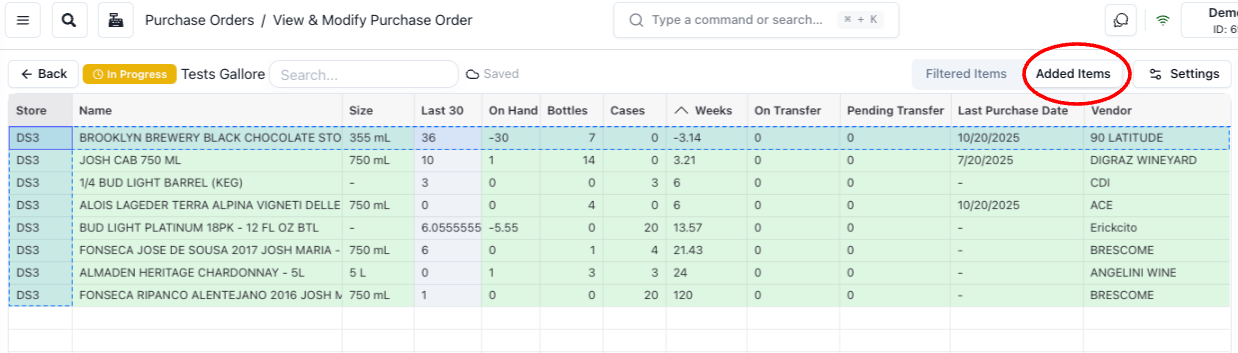
After you have finished selecting the items you want to order, you can click on the "Added Items' tab to see only the items you have selected to be ordered:
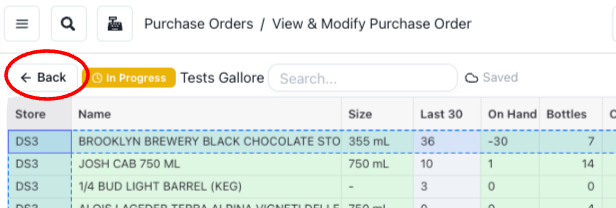
Once you are satisfied, click the "Back" button to do one final review:
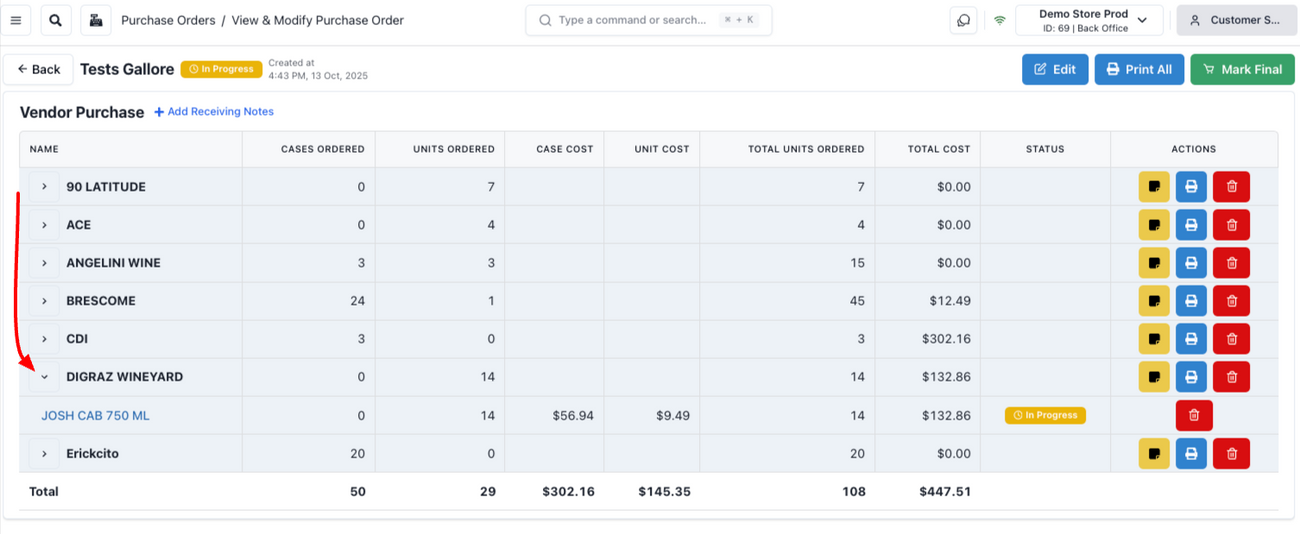
This will lead you to the main PO page where you can use the toggles to review what items you are ordering form each vendor:
Once you are ready, you can mark your PO as final: