Account Users
Last updated May 29, 2025
The first thing to know about adding users is that each user will need a specific role. Roles will give users different abilities within your system, so it is very important to select the right role.
Default Roles
- OWNER: This should be the business owner, it has all permissions
- POS_REGISTER: This role should be assigned to the email address you'll use permanently at the register
- ADMIN: This should be for someone, other than the owner, who will be managing the system and permissions
- MANAGER: This is meant for a store manager. It has a few limitations, compared to Admin and Owner, but has more permissions than Cashier
- CASHIER: This role has basic permissions like ringing up transactions, etc
Roles have been set up with the most common permissions for them as a default, but you can edit them to fit your needs. You are able to create custom roles, but clicking "Create Role" and modifying as you need.
- You can see and manage the list of roles for your store and their permissions here , or by logging in, selecting "Settings" from the dropdown menu on the upper left corner, and clicking on "Roles" from the stationary menu on the left of the page.
Manage Users
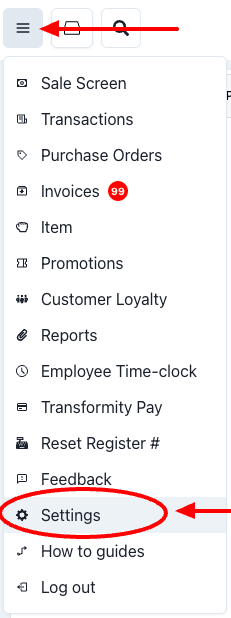
To manage users, click on the dropdown menu on the upper left corner and select "Settings."
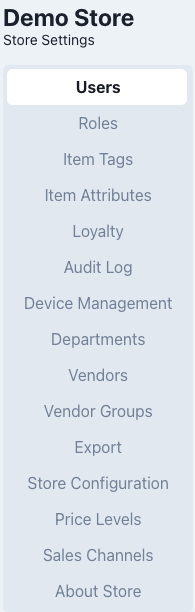
This will open the back office settings page, which will have a stationary menu on the left. Select "Users." -->
Now you will be in the "Manage Users" page, where you can add users, assign roles, and delete profiles
Adding Users
The first user on the list will be the store owner, listed as Account Admin (added by transformity before you log in for the first time).
The second one should be a POS_Register user. This user will be permanently logged in and allow sub-users (cashiers) to log in. This email address should be different from that of the owner's.
After this, you can add admins, managers, and cashiers. Below is a general list of steps of how to add any users.

- Click the "+ Add User" blue button. This will open a pop-up window requesting information.
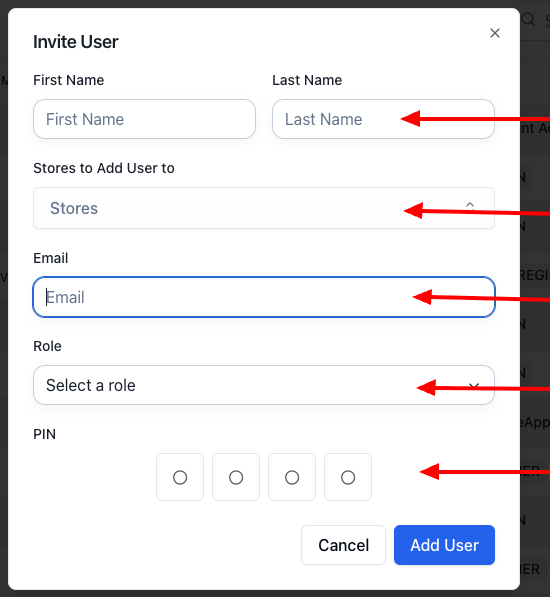
- First and Last Name: This should be the users first and last. If you are creating cashiers, note that the first name will appear on receipts.
- Stores: Select your store.
- Email: Personal email for admin/manager and a variation of POS_REGISTER for cashiers.*
- Role: Use the drop-down to assign a role.
- Pin: Choose 4 digits that your users will use when logging as themselves into the register.
*Note: Your cashiers don't have to provide a personal email address, if they don't need to access your system remotely or from a personal device. You can simply input a variation of the email address you are using for the POS_REGISTER users, by adding a + symbol and a differentiator. For example, if your POS_REGISTER user was created under "beststore@gmail.com," you could create your cashiers under "beststore+cashier1@gmail.com," "beststore+cashier2@gmail.com,"etc.
And of course, let us know if you have any questions!