Parent and Child Items in DrinksPOS
Last updated August 18, 2025
A parent and child relationship within DrinksPOS occurs when a product that is normally sold as a pack is sold per unit. For instance, you have a 6-bottle pack of Smirnoff Ice Grape and you would like to sell each bottle separately.
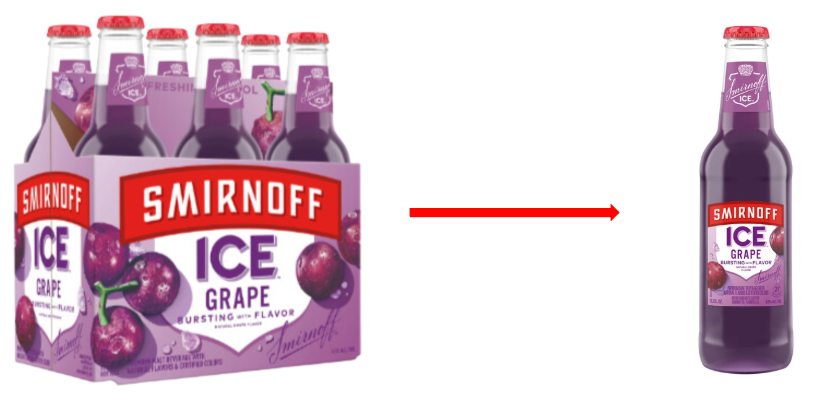
To do this without confusing your inventory, you would make the 6-pack "the parent" and each bottle "the child." This way, each time a can is sold, the system inventory will get updated to remove one bottle from a 6-pack, showing you exactly how many single bottles you have left.
Below there is a video tutorial, as well as a step-by-step guide to creating child items.
Video Tutorial
Step-By-Step Guide to Creating a Child Item
To create a child, the first thing you need to do is identify the prospective parent.
Let's continue using the example above and say you want to break a 6-pack of Smirnoff Ice Grape.
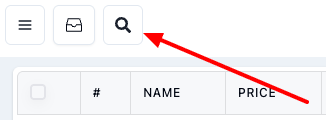
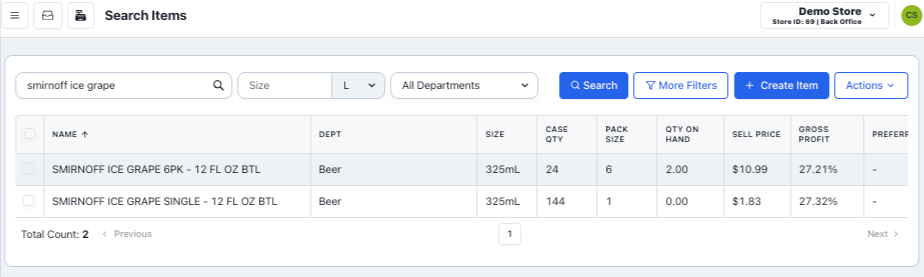
First, find the item by clicking on the lens icon on the upper left corner of the screen and entering the name, barcode, or SKU of the item (or part of the name) in the search bar on the next window and clicking "Search."

After clicking "Search" a list of all items containing the search terms you used will populate below.
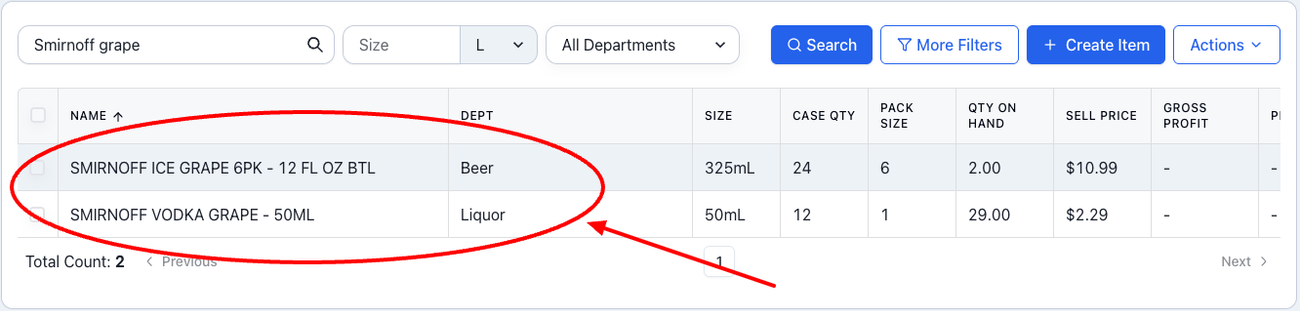
Click on the one you were trying to find. This will take you to the item's page. Once there, click on "Actions," which will open a drop-down menu.
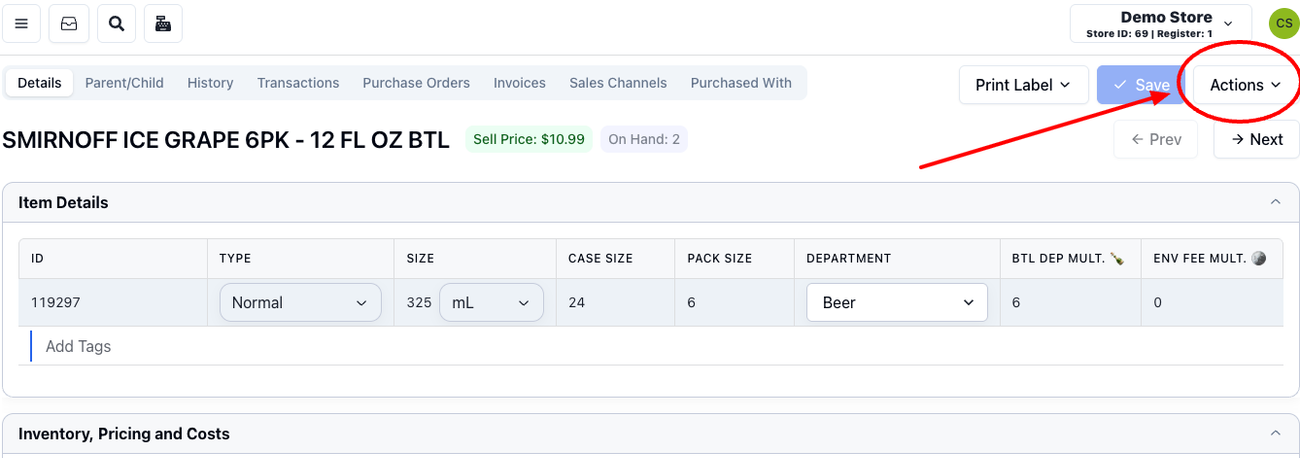
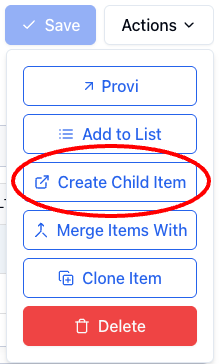
In the drop-down menu, select "Create Child Item."
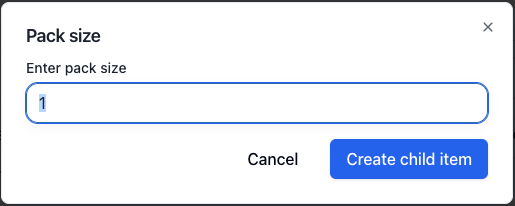
This will open a pop-up window which will give you the option to type the number of units that will constitute a child. In this case, it would be one. However, if you were trying to sell 2-packs of this 6-pack parent, you could type 2.
Once that selection is made, you can click "Create Child Item."
This will take you to the Child Item properties page, where you will finish setting everything up. Most will be automatic, but there are a few things you must add, change, and verify.
Completing Child Item Setup (Verification)
In this new page, you will need to add, change, and verify information in different toggle sections.
Item Details Toggle
UPC:
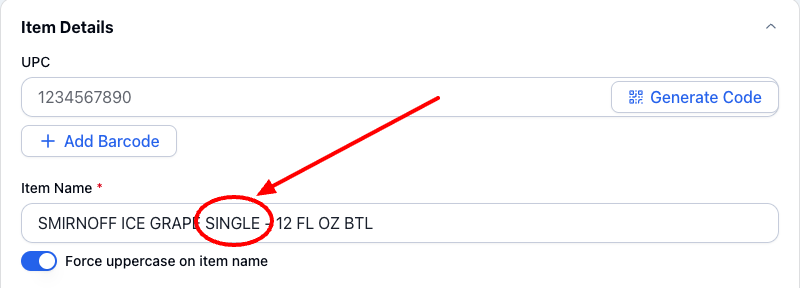
The first thing to add is the barcode. Make sure the cursor is inside the UPC field and scan your child item. This will populate the code.
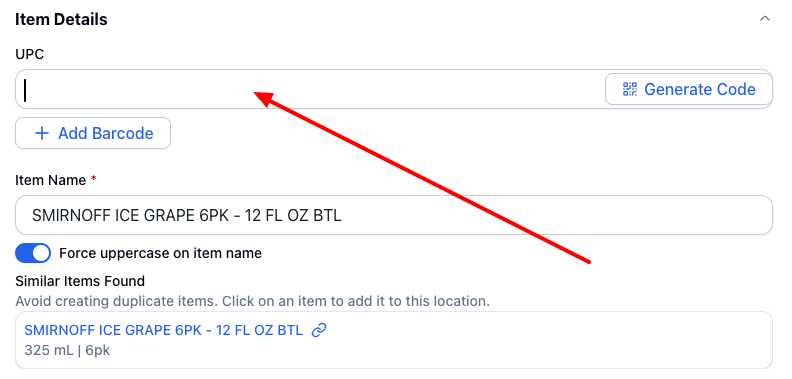
*In some versions of the page, you will see 1234567890 in the UPC field. That is not a barcode. It is just an example.
**In some occasions, the barcode will be the same as the parent item (like a 6 pack of cans that don't come inside a box). In this case, whenever you ring up the item, the system will ask you which of the related items you are ringing up.
Item Name:
Go to "Item Name." This will show you the parent name which in this example includes the 6PK specification. To avoid confusion in your system and in your customer's receipt, you would change the "6pk" to "Single."
Before:
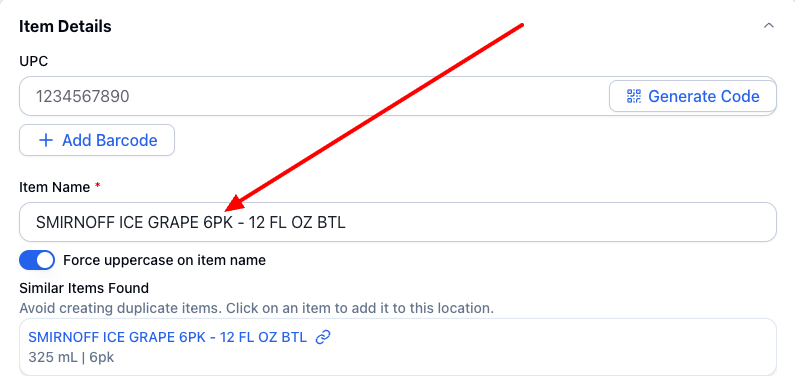
After:
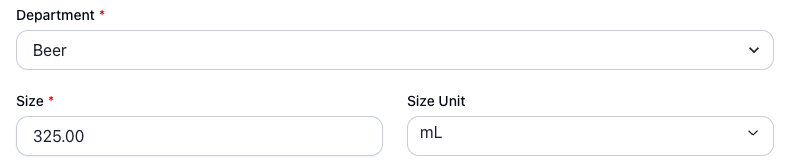
Right under this, you will see the department, item size, size unit. These should all have automatically moved form the parent item, but you can always double check that they are correct.
By the same token, you will see the case size, pack size, bottle deposit, and environmental fee, if applicable. These should all have been automatically calculated.
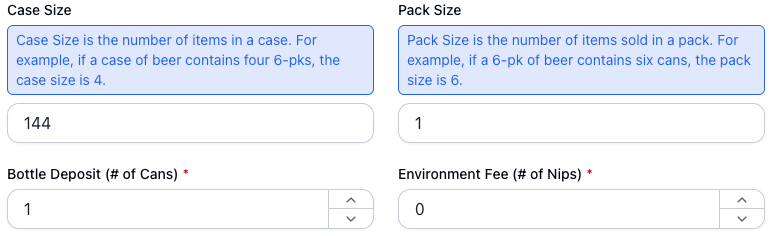
In this example, the child's case size is 144 and the pack size is 1 because the parent's case size is 24 and the pack size is 6. 6 X 24 = 144 units. The pack size of the child is 1 because you are selling a single unit.
Pricing Toggle
Open the Pricing toggle and verify that pricing matches your expectations. The system will automatically divide the parent size cost and sell price. Here you have a chance to modify the unit price. If you modify it, you will se your "Gross Profit" field automatically change.
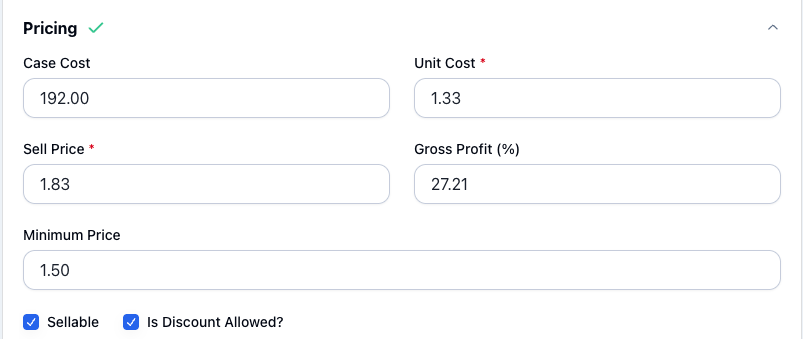
We also recommend filling out the "Minimum Price" field to ensure that regardless of discounts, you will never sell this item for less than is profitable.
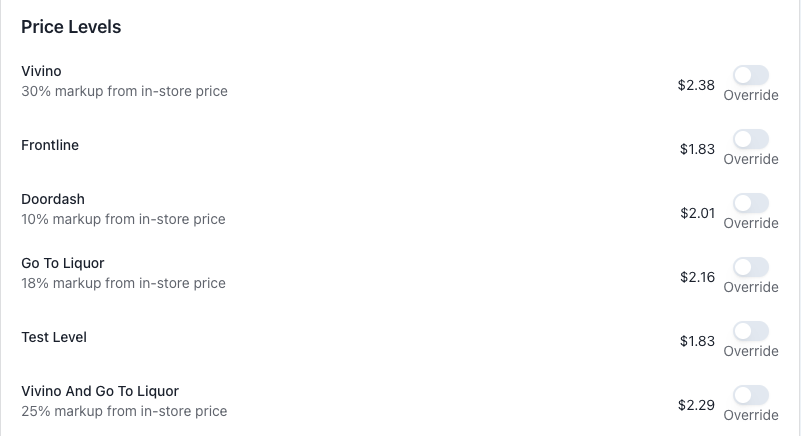
Under this same toggle, you will find "Price Levels." This refers to the price levels you have in your different sale channels (like Doordash, Vivino, etc). Each price level will show you the marked up price and the option to override it if you would like to charge the same price regardless of sales channel.
and you are all set. To complete your child creation, just click the blue Submit button.
Identifying a Child Item
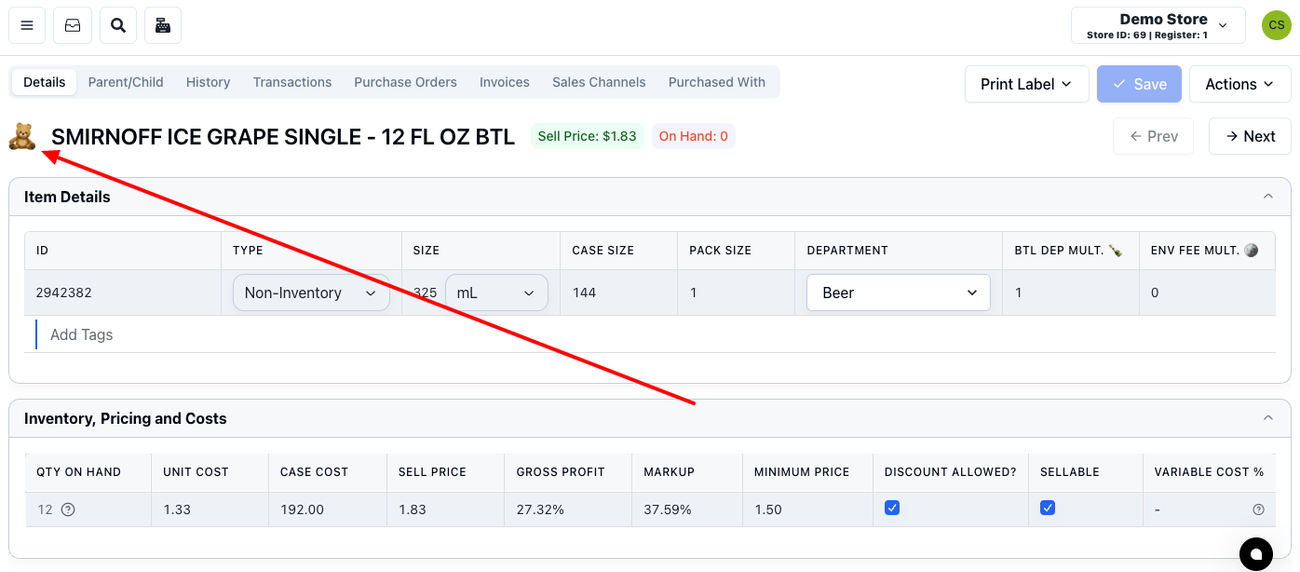
To know that an item is a child and has a parent item, just look for the teddy bear icon on the upper left corner of the product page:
Finding a Child's Parent Item
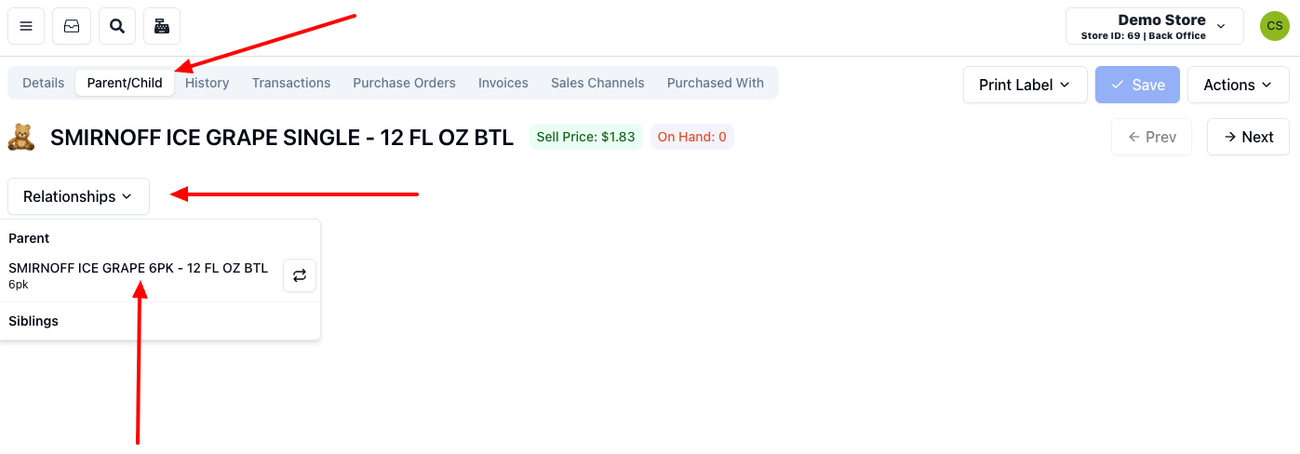
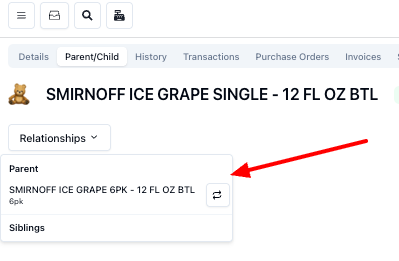
To find a child item's parent, just go to the "Parent/Child " tab and use the "Relationship" drop-down. You will see the parent and any sibling items, if available.
Determining Wether an Item Has a Child
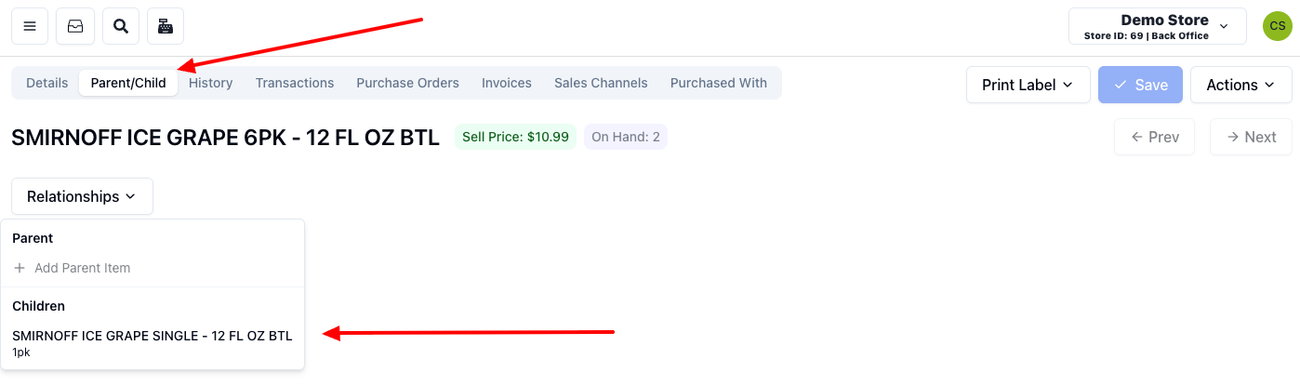
To find out if a parent item has a child, just go to the "Parent/Child " tab and use the "Relationship" drop-down. You will see all the relationships that have been created for the item. If the dropdown is empty, it will mean the product does not have any child items.
Connecting an existing Parent to an existing Child
Sometimes you will have two items that exist individually in your system, but that need to be connected as a child/parent in your POS.
Because these items already exist, you can easily create the relationship by following a few steps. Let's use the same product example as above:

- First, find the item by clicking on the lens icon on the upper left corner of the screen and entering the name, barcode, or SKU of the item (or part of the name) in the search bar on the next window and clicking "Search."

After clicking "Search" a list of all items containing the search terms you used will populate below.
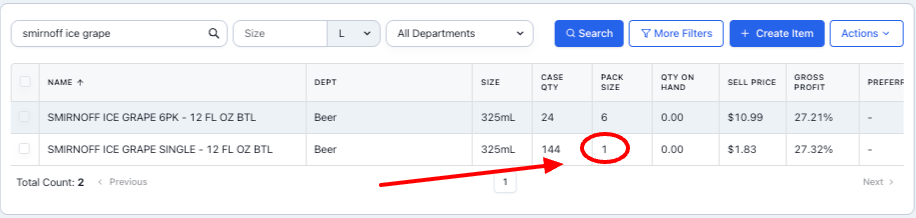
- Click on the item you would like to be the child. Use the pack size field to verify you are choosing the right one. In this case, it should be the packs size of 1.
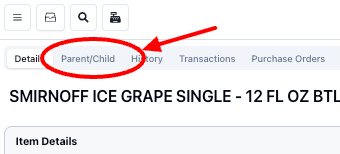
- Once you are in the item details page, click on the Parent/Child tab:
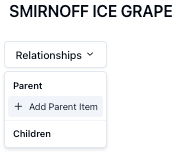
- Once in that tab, click the dropdown Relationship menu: and select "+Add Parent Item."
A a pop-up window will appear:
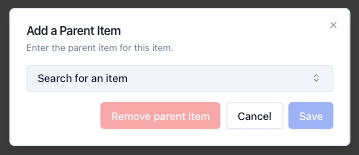
- Click on the "Search for an item" field and type the name of the item you would like to link. In this case, Smirnoff Ice Grape.
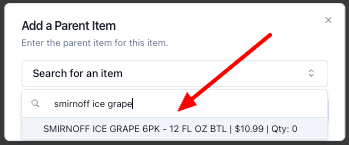
You will see suggestions populate as you start typing. Once the one you are looking for appears, click on it.
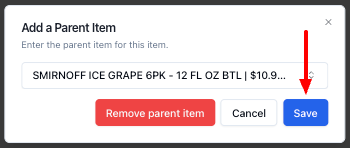
- This will change the display and give you the option to "Remove parent item" or "Save." Click "Save."
- A quick message saying your item has been updated will flash by and now you'll see a teddy bear icon on the item details page, as well as a Parent item under the Relationship menu.
Note: You can add the same parent to multiple child items. If you had Smirnoff Ice Grape single, 2-pack, 3-pack, etc, you could go through this process with each of them and connect them to a 6-pack parent.
Please let us know if you have any questions!